

Introduction
Many real world websites implement authentication schemes
that restrict user access to a members only area of the website. The most
common approach of website authentication is storing membership information
into a database and validatng users based on their user names and passwords.
Though such a website specific authentication works well for many cases, it
requires that the end users maintain a separate membership account with the
website. This means the users are forced to create yet another account with yet
another website. It would be nice if you integrated your website authentication
with some popular website where users might already have an account. To that
end Facebook Helper for WebMatrix
does a good job by allowing you to integrate Facebook authentication with your
website membership scheme, allowing any user having a Facebook account to sign into
your website without the need to create another user name and password. This
article illustrates how this can be done in step-by-step manner.
Implementing Security for Your WebMatrix Website
First of all, you will create a website in WebMatrix that has
membership features enabled. Begin by creating a new website based on the Starter
Site template and name it "FBLoginDemo."

Figure 1: WebMatrix Starter Site template
Then open the _AppStart.cshtml file and make sure that it
has the following piece of code:
@{
    WebSecurity.InitializeDatabaseConnection
           ("StarterSite",
             "UserProfile",
             "UserId",
             "Email",
              true);
}
The remaining commented lines can be deleted if you don’t
wish to configure any SMTP server and Email related settings. The
InitializeDatabaseConnection() method of the WebSecurity class initializes a
connection to the membership database. The first parameter (StarterSite)
indicates a database connection string name or SQL Server Compact
database file name. In the above code, StarterSite is the name of the SQL
Server Compact database file (.sdf). The second parameter (UserProfile)
specifies the name of the database table that stores the user information. The
third parameter is the name of the database column that stores user IDs
(UserId). This column must have a data type of integer. Similarly, the fourth
parameter indicates name of the database column that stores user names (Email).
Typically this column will have data type of string. The last parameter, if set
to true, indicates that membership related tables should be created
automatically if they don’t exist. A value of false indicates that these tables
should not be created automatically. Notice that by default, Email acts as a
user name. You can of course change this behavior as per your requirement.
Now, add a new .cshtml file named SecuredPage.cshtml and add
the following code to it.
@if (!WebSecurity.IsAuthenticated) {
      Response.Redirect("~/Account/Login");
 }

@{
    Layout = "~/_SiteLayout.cshtml";
    Page.Title = "About My Site";
}
The above code checks whether a user is authenticated or not
using the IsAuthenticated property of the WebSecurity class. If the user is not
yet signed into the website, he is taken to the login page.
Now, run SecuredPage.cshtml and you should be taken to the
login page as shown below:
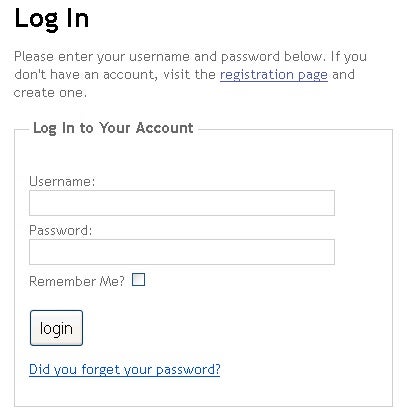
Figure 2: Login page
Click on the registration page link at the top and create a
new user by entering Email and password information in the registration form.
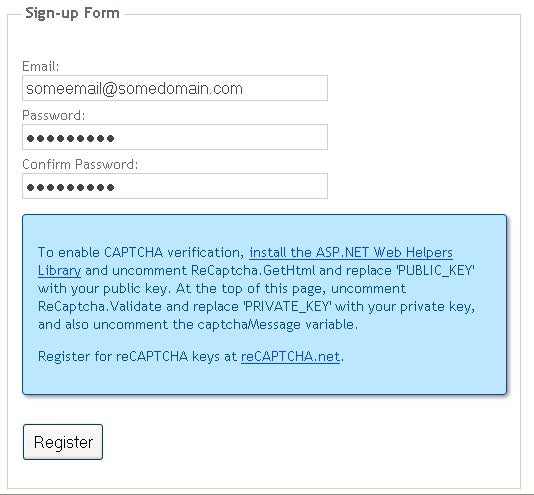
Figure 3: Sign-up Form
This completes the membership setup of your WebMatrix
website.
Where is Membership Data?
In the preceding section you registered a new user but where
is the membership data? Click on the Databases option of WebMatrix and you will
see StarterSite.sdf file. Expanding the tables of the StarterSite database will
reveal two tables that store user information – UserProfile and
webpages_Membership. The UserProfile table stores the user name and user ID.
Other information such as password, creation date and confirmation status are
stored in the webpages_Membership table.

Figure 4: Webpages_Membership table
Notice that there are additional tables for storing role
information. We don’t need role specific features in this example.
Installing Facebook Helper Package
Now that your website is membership enabled, let’s install
the Facebook Helper package. Click on the Site option and locate the
"ASP.NET Web Pages Administration" option. Create a password as
suggested by the on-screen prompt and login to the administration area. Search
for Facebook and you should see Facebook Helper listed as shown below:
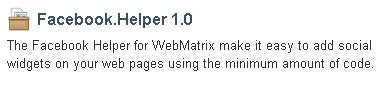
Figure 5: Facebook Helper
Click on the Install button to install the Facebook Helper in
your website. Installing the Facebook Helper will add certain files to your
website.

Figure 6: Facebook folder
Notice the NuGet packages added to the website and also the
Facebook folder. Now you are ready to integrate Facebook login into your
website.
Initializing Facebook Helper
Integrating Facebook login with your website requires that
you initialize the Facebook Helper first. Begin by creating a new Facebook
application by visiting developers.facebook.com/app.
We won’t go into the details of creating a new Facebook application here. All
you need to work further is your application ID and secret key.
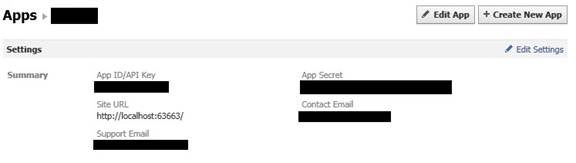
Figure 7: Application ID and secret key
Once you have the Facebook application ID and secret key,
initializing the helper takes merely one line of code in _AppStart.cshtml file.
@{
    Facebook.Initialize("Facebook app Id here", "app secret here","StarterSite");
}
Make sure to replace appropriate app ID and app secret key
in the above call to Initialize() method. The last parameter is the name of the
database that stores membership information. This is necessary because the
initialization process needs to create a table in the specified database for
storing the Facebook login integration information. You will know more about
this table in later sections.
Rendering Login Button
The next step is to render a Facebook login button somewhere
on the webpage so that the user can use it to sign in to Facebook. Open the
_SiteLayout.cshtml file and modify the <HTML> tag as shown below:
<html lang="en" @Facebook.FbmlNamespaces()>
The FbmlNamespaces() method emits certain namespaces
specific to FBML.
You can look at the exact namespaces by viewing the page HTML source after
running it in the browser. Then locate the Register and Login links and add the
following code :
<ul>
   <li><a href="@Href("~/Account/Register")">Register</a></li>
   <li><a href="@Href("~/Account/Login")">Login</a></li>
   @Facebook.GetInitializationScripts()
   <li>@Facebook.LoginButton("~/Account/Register")</li>
</ul>
The GetInitializationScripts() method initializes the
Facebook JavaScript SDK to be able to support the XFBML
tags of the social plugins. The LoginButton() method renders the Login button. Although
your website is using the login credentials of Facebook, it may need to gather additional
website specific details from the user (some profile information for example).
This is accomplished by the supplied URL (~/Account/Register). When users sign into
your website using Facebook credentials for the first time, they will be taken
to the registration page for collecting additional pieces of information.
If you run the website after adding the above code you
should see the Facebook login button as shown below:
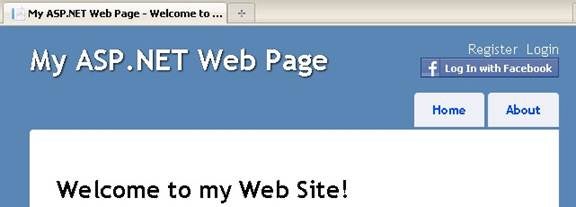
Figure 8: Facebook Login Button
Associating Facebook Users with the Website
Next, we need to write some code that will associate a
Facebook account with your website user account. This needs to be done in the
registration page. Open the Register.cshtml file and locate the INSERT
statement that adds an entry to the UserProfile table. Just below the INSERT
statement, call the AssociateMembershipAccount() method of the Facebook Helper class
as shown below:
// If all information is valid, create a new account
  if (isValid) {
  // Insert a new user into the database
  var db = Database.Open("StarterSite");

  // Check if user already exists
  var user = db.QuerySingle("SELECT Email FROM UserProfile WHERE LOWER(Email) = LOWER(@0)", email);
  if (user == null) {
    // Insert email into the profile table
    db.Execute("INSERT INTO UserProfile (Email) VALUES (@0)", email);

    Facebook.AssociateMembershipAccount(email);
    .......
The AssociateMembershipAccount() method accepts the user
name that is to be associated with the Facebook account and adds an appropriate
entry into the webpages_FacebookCredentials table.
To test the Facebook login in action, run the website and
click on the "Login with Facebook" button. If the current Facebook
user is accessing the Facebook application for the first time a permission
granting screen will be displayed as follows:

Figure 9: Login with Facebook
Click on the "Allow" button to grant the
permission to the application. You will be then prompted for Facebook login
credentials.

Figure 10: Facebook login credentials
If the login process is successful you will be logged in to
Facebook and will be redirected to the register page. Upon entering the
registration details, the default (or SecuredPage.cshtml depending on what you
requested) page will be displayed.
NOTE:
Just for the sake of testing you can use the same registration page that was created
with the website creation initially. However, remember that password fields
won’t be of any use because you will be signing in with your Facebook
credentials and not the password mentioned on the registration page.
Open the StarterSite.sdf database file again and locate
webpages_FacebookCredentials table.
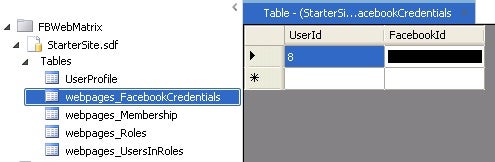
Figure 11: The webpages_FacebookCredentials table
Notice how an entry links UserId and FacebookId. The profile
information for the specific UserId can be found in the UserProfile table. When
you try to access the website for the second time you won’t be taken to the
register page again because the Facebook account is already mapped to an
existing UserId.

Figure 12: Your website login is now integrated with Facebook authentication system
That’s it! Your website login is now integrated with
Facebook authentication system. New users of your website can either register a
new account with your website or use their existing Facebook credentials to
sign in to your website.
Summary
Registering and maintaining user credentials with multiple
websites is a tedious task for end users. It would be nice if you allowed users
of your website to use their login credentials of some popular website such as
Facebook. Facebook Helper allows you to integrate Facebook authentication with
your website. In order to use this integration you need to install Facebook Helper
package and then use various methods of Facebook Helper class. The
LoginButton() method of Facebook Helper renders a "Login with
Facebook" button and AssociateMembershipAccount() method links a Facebook
account with your website account. Such integration can provide a seamless
sign-in experience for the end user.